


Looking to boost your app's visibility and acquire more users? Our 2025 ASO Report is your ultimate guide to navigating the evolving app store landscape. Packed with data-driven insights, keyword trends, and top-ranking app strategies, this report will equip you with the knowledge to optimize your app's presence and achieve organic growth.
App Store Connect is Apple’s online platform that lets you upload app builds, configure your app’s listing, and manage everything needed to release your app on the App Store.
It’s the central hub where you handle app metadata, pricing, App Store analytics, user reviews, and more.
In 2026, Apple continues to expand App Store Connect’s features (like product page optimization and custom product pages for marketing), making it more important than ever to master this tool for a successful app launch.
In this comprehensive step-by-step guide, we’ll walk through how to use App Store Connect – from setting up your developer account, creating a new app listing with all the required metadata, uploading your build via Xcode or Transporter, setting pricing and availability, to finally submitting your app for review.
We’ll also cover tips for managing your app post-launch (analytics, updates, and user feedback). Let’s get started!

What is App Store Connect (and why it matters in 2026)
6App Store Connect is Apple’s official web (and iOS) portal for developers to manage their apps on the App Store.
As part of the Apple Developer Program, it allows you to upload, submit, and manage apps across Apple platforms (iOS, iPadOS, macOS, etc.). Through App Store Connect, you handle app listing details (name, description, screenshots, etc.), view sales reports and app analytics, invite beta testers via TestFlight, and much more.
In 2026, App Store Connect remains crucial because Apple has tightened quality and privacy standards and introduced new tools that developers should leverage. For example, you can run A/B tests on your App Store listing (using Product Page Optimization) or create custom product pages for different audiences– features that can significantly improve your app’s visibility and conversion. Additionally, the platform supports all new Apple devices (like the latest visionOS apps) under one dashboard, so you can manage multi-platform apps in one place. Simply put, if you want your iOS app to succeed, you need to know how to use App Store Connect effectively.
Step 1: Set up your App Store Connect account
Before you can use App Store Connect, you must enroll in the Apple Developer Program. Without a developer account, you can’t submit apps to the App Store.
Sign up on Apple’s developer website using your Apple ID (and be prepared to enable two-factor authentication, which Apple requires for developer accounts).
With your account ready, you can now use App Store Connect to create a new app record and prepare it for submission.
Step 2: Create a new app listing in App Store Connect
Once your developer account is active, you can create a new app listing (app record) in App Store Connect. This is essentially registering the app’s identity and basic info on the App Store. To add a new app:
- Navigate to My Apps: Log in to App Store Connect, and click on “My Apps” in the dashboard. Then click the + (Add) button and choose “New App.”
- Enter App Details: A dialog will prompt you for some initial information about your app. Fill in the following (you cannot change certain details later, so double-check them):
- Platform: Select the platform(s) for your app (iOS, and/or other Apple platforms your app supports). For most, this will be “iOS” – note that if you have a compatible iPad or macOS version via Catalyst, you can add those platforms here as well.
- App Name: The name of your app as it will appear on the App Store (up to 30 characters). It must be unique among all apps on the store in your chosen primary language. Choose a clear name that reflects your app’s purpose. (Pro tip: Use relevant keywords in the name if possible to improve discoverability, but keep it branding-friendly.)
- Primary Language: The default language for your app’s listing (e.g. English). You can localize your app’s store listing into other languages later, but this is the language that will display if no localization is available.
- Bundle ID: Select the App ID (bundle identifier) that matches your app. This must exactly match the bundle ID in your Xcode project for the app. (Bundle IDs are created in the Apple Developer portal’s Certificates, Identifiers & Profiles section – ensure you’ve made one for your app before this step.) Once an app record is created, you cannot change its Bundle ID, so pick carefully.
- SKU: A unique internal ID for your app (not shown to users). This can be any string (like an SKU or code you use internally to identify the app). For example, com.yourcompany.appname or a product code. It must start with a letter or number and can include letters, numbers, hyphens, periods, or underscores.
- User Access: If you have multiple team members, you can restrict this app’s visibility to certain people. Choose “Full Access” to allow all team members (with appropriate roles) to see the app, or “Limited Access” to only allow specific users. (Some roles like Admin or Finance will always see all apps regardless.) For most indie devs, Full Access is fine.
- Create the App: After filling in these details, click “Create.” App Store Connect will set up a new app record with a unique Apple ID and status “Prepare for Submission.” Your app listing is now created (it will appear in My Apps).
At this point, you have an empty container for your app on App Store Connect. Next, we will add all the required information and assets to this listing and upload the actual app build.
Note: If this is your first app on the account and it’s a paid app, you might be prompted to complete the Paid Applications agreement before proceeding. Ensure that is done so you can set a price and release your app for sale.
Step 3: Upload your app build
With your App Store Connect listing created, the next step is to upload the actual binary of your app (the compiled build). Apple provides a couple of ways to deliver your app build to App Store Connect:
- Using Xcode: This is the most straightforward for iOS developers. Open your project in Xcode and make sure your app’s version and build number are set correctly for release (increment from any TestFlight builds if needed).
- Using Transporter (macOS app): If you prefer a GUI tool or are not using Xcode, Apple’s Transporter app is an easy way to upload your .ipa file to App Store Connect. Download Transporter from the Mac App Store, sign in with your Apple Developer credentials, then simply drag and drop your app’s IPA file and press “Deliver.” Transporter will upload the file and show progress, logging any errors or warnings (such as missing icons or other metadata issues).
Both methods achieve the same result: your build file (the app binary) will appear in App Store Connect.
Tip: Ensure your build is compiled with the correct release configuration, and has a unique build number (CFBundleVersion) and version string (CFBundleShortVersionString) that match what you intend for the App Store. Apple will reject uploads that have a version already used, or which don’t match the app record’s info.
Also, double-check that your app icon and launch screen assets are included, and you’ve removed any debug or placeholder content before uploading.
Once the build is uploaded successfully, you’ll see it listed under your app’s Builds section. Now you’re ready to tie together the build with your app store listing information and proceed to submission.
Step 4: Enter app listing information and metadata
While your build is processing (or even before you upload it), you should fill out all the App Store listing details in App Store Connect.
This is the content that users will see on the App Store page for your app, and Apple requires it to be complete before you submit for review. Here’s what to cover:
- App Information (Basic Info): In your app’s App Store Connect record, go to the App Information section. Here you can set or edit:
- App Name and Subtitle: You already provided the name. Add a subtitle (up to 30 characters) – a one-line tagline that appears under the app name on the store. Use this to convey a quick value proposition or context (and include a keyword if appropriate).
- Categories: Select a Primary Category that best fits your app (e.g. Games, Productivity, Health & Fitness, etc.). You may also choose an optional Secondary Category if it fits into two areas. The category helps users find your app in those sections of the App Store, so choose accurately.
- Ratings (Content Rating): Apple will require you to fill out a questionnaire about your app’s content (e.g. cartoon/fantasy violence, profanity, mature themes, etc.) to generate an age rating. You’ll find this under the Rating section – answer honestly. The resulting age rating (e.g. 4+, 9+, 12+, 17+) will be shown on your App Store page.
- App Icon: Upload a high-resolution 1024x1024px app icon (PNG) if prompted. This is the large icon that will be used on the App Store listing (separate from the icons in your binary). It should have no alpha transparency and no rounded corners (Apple will mask it).
- Privacy Policy URL:Required for all apps in 2026 – you must provide a URL to your app’s Privacy Policy. Host a privacy policy on your website (or a PDF link) that clearly explains how user data is handled. Even if your app targets kids or is very simple, Apple mandates a privacy policy. Enter the URL in the designated field.
- Privacy “Nutrition” Questionnaire: Apple also requires developers to disclose their data collection and usage practices in App Store Connect via a questionnaire. In the App Privacy section, you’ll need to answer questions about what data (if any) your app collects (e.g. contact info, location, usage data, etc.), and for what purpose. This populates the “App Privacy” section on your App Store page, informing users of your data practices. Be thorough and truthful – failing to accurately report data usage can lead to App Store rejection. (If your app uses third-party SDKs, you must account for data they collect as well.)
- App Store Listing (Version Details): Now navigate to the “App Store” tab (or the section for the specific version, e.g. “iOS 1.0”) for Prepare for Submission. Here, you will enter details specific to this version of your app:
- Description: Write a compelling description for your app (up to 4,000 characters). This should explain what your app does, its features, and why it’s useful. A good description can improve conversions, so highlight key benefits in the first few lines. Include relevant keywords naturally, but avoid keyword stuffing. (For tips on writing an ASO-friendly description, see our guide on how to write ASO-optimized app descriptions.) Remember, you can update the description with each app update if needed, but make sure it accurately reflects your app’s functionality.
- Keywords: Provide a set of comma-separated keywords (up to 100 characters total) that describe your app. These are not visible to users but are used by the App Store search algorithm. Include important terms users might search for (e.g. “budget, finance, expense tracker” for a budgeting app).
- Screenshots and App Preview: Prepare and upload App Store screenshots for all required device sizes. For iPhone apps, you typically need screenshots for 6.5-inch displays (and 5.5-inch if you want to cover older devices). If your app supports iPad, you need iPad screenshots as well. You can upload up to 10 screenshots per localization for each device size, but at minimum Apple requires at least 1–3 screenshots per device category. Use this opportunity to showcase your app’s UI and key features. Make sure the images are high-quality and follow Apple’s screenshot guidelines (correct resolution, no extra marketing text that isn’t captured from the app, etc.). App Previews (short videos) are optional – you can upload up to 3 videos per device size if you have them. They can greatly help demonstrate your app, but ensure they follow Apple’s rules if you include them.
- Version Info (What’s New): Since this is the first version, you might just put something like “Initial release” or highlight key features. In future updates, this What’s New text is where you describe changes or new features.
- Build Assignment: Once your build has finished processing (from Step 3), you will see it available in the Build section of this page. You will need to select the build that corresponds to this app version before you can submit. (If the build isn’t showing up yet, give it some time or refresh the page.) We will do this in the next step when finalizing for submission.
- App Review Information: Fill in contact info for the App Review team here. Typically, provide a name, phone number, and email where Apple can reach you in case they need to clarify something during review. If your app requires login credentials (e.g., it has a login screen), you must provide a demo account username & password for the reviewers to test your app. For example, create a test account on your app and supply those credentials. If certain features require special setup or there are any specific instructions for testers, note them here as well. This field is crucial to avoid unnecessary rejections because the reviewer couldn’t fully access your app.
- Advertising Identifier (IDFA): If your app uses advertising frameworks (IDFA), you must indicate this and answer whether you show ads, or use IDFA for attributing installs, etc. This typically pops up during submission – just be prepared if your app includes ads.
- Other Attachments: In some cases, you might need to upload attachments (like a demo video for review if functionality is hard to explain, or documentation for certain regulated apps). This is optional and case-by-case. Most apps won’t need to attach additional materials.
Take your time to ensure all the metadata is accurate and complete. Typos or placeholder text in your listing can not only turn off users but also cause Apple to reject your app. Apple’s reviewers check that your screenshots and description match the app content (and that there’s no mention of unsupported devices or other platforms, etc.).
Also, make sure you do not include any prohibited content in your metadata (no mentions of other platforms, no irrelevant keywords, no pricing info like “free” in the description, and no calls to action to rate the app, etc., as per Apple’s guidelines).
Now that your app’s information is in place and your build is uploaded and selected, the only things left are to configure pricing and finally submit the app to Apple for review.
Step 5: Set pricing and availability
Every app on the App Store needs to have a pricing designation, even if it’s free. In App Store Connect, navigate to the Pricing and Availability section for your app to configure the following:
- Price: Decide if your app will be free or paid. You can change your app’s price later, but changes can take effect after a day or so and existing subscribers (for subscriptions) will be handled with price increase prompts if applicable.
- Availability (Regions): By default, your app will be available in all App Store countries/regions once approved. You have the option to deselect specific countries if you do not want your app distributed there. For example, some developers do a soft launch by initially releasing the app only in a few countries to gather feedback before a worldwide release. You can adjust the availability anytime, even after launch (for instance, adding regions later).
- Release Options: Decide how your app should be released after it passes review. In the Pricing and Availability page (or sometimes in the version submission page), you have options for release timing:
- Automatic release – As soon as the app is approved by Apple’s review, it will go live on the App Store automatically.
- Manual release – The app will wait in a “Approved” state (called Pending Developer Release) until you manually release it. This is useful if you want to coordinate launch timing (e.g., for marketing or if you want to ensure servers are live, etc.). You’ll get a notification of approval, and then you can hit “Release” when ready.
- Scheduled release – You can pick a specific date to release the app once approved. Apple will hold the app and release it on that date.
- Pre-Orders – If you want to hype your app before it’s live, you can enable it for pre-order. This means customers can “order” the app before launch, and on release day they get notified/downloaded automatically. You set a future release date (at least a few days out). This is optional but can be a marketing strategy.
- Tax and Compliance: If your app has content that requires a specific tax category (for example, some countries have different tax rates for apps with news content, etc.), ensure you set the appropriate category.
Also, verify your Agreements, Tax, and Banking info is up to date here – you won’t be able to release a paid app without having provided banking details.
Setting the pricing and availability is usually quick, but it’s important to review these settings so you know where and when your app will appear once approved. For a first launch, many developers opt for manual release to control the timing. Once these are configured, you are ready for the final step: submitting your app to Apple for review.
Step 6: Submit your app for review
This is the big moment – sending your app to Apple’s App Review team. Before you hit that button, double-check that you’ve completed all previous steps:
Your build is uploaded and selected, all screenshots and fields are filled, pricing is set, and there are no error messages in App Store Connect. App Store Connect will usually alert you if something mandatory is missing.
Now, the waiting game begins.
How long does App Review take? It varies, but in 2026 the typical review time for most apps is around 1–3 days, with many reviews completed within 24-48 hours. However, it can be longer (or occasionally much faster).
Apple also states it can take up to 24 hours after approval for your app to appear on the App Store (this usually happens quicker, but be aware of the potential delay).
You’ll receive email notifications at each stage of the process – e.g., when the app status changes to In Review, or if it gets approved or rejected.
While waiting, you can check the status in App Store Connect: go to the Activity tab > App Store Versions (or Version History). There you’ll see if the app is in review, approved, or if there’s a rejection with notes.
Managing your app post-launch in App Store Connect
Getting your app onto the App Store is a huge accomplishment, but successful app developers and publishers know that ongoing management is key to long-term success. App Store Connect provides several tools to help you manage your app after submission:
- App Analytics: Once your app is live, App Store Connect’s App Analytics dashboard starts collecting data. Here you can track metrics like downloads, total installs, App Store impressions (how many times your app listing was viewed on the store), user engagement, retention, and more.
These insights help you understand how your app is performing and how users are discovering and using it. For example, you can see how many people opened your app via App Store search versus referrals, the conversion rate from viewing the store page to downloading, and even metrics like crashes or active devices. Use this data to make informed decisions – if engagement is low, you might need to improve onboarding; if your product page views are high but downloads are low, consider optimizing your screenshots or description.
- Sales and Financial Reports: If your app is paid or has in-app purchases/subscriptions, the Sales & Trends section will show you revenue, units sold, and other financial metrics. You can break it down by region or over time. This helps you identify your key markets and revenue sources.
For example, you might discover your app is unexpectedly popular in a certain country, which could inform your marketing or localization priorities. Financial reports can be downloaded for deeper analysis. (Also, keep an eye on Apple’s payouts and ensure your banking info is updated; the Payments and Financial Reports section will show monthly earnings and payouts.)
- User Reviews and Ratings: App Store Connect allows you to monitor and respond to user reviews of your app. Under Ratings & Reviews, you can see what users are saying and their star ratings. Engaging with reviews – especially addressing constructive criticism or helping users who faced issues – can improve your app’s reputation. Apple even notes that responding to user reviews can improve your app’s discoverability and rapport with users.
Thank users for positive feedback and politely address negative feedback with acknowledgment and help. Regularly check this section; good customer support can turn a frustrated user into a happy one, and future customers see developer responses which builds trust.
- App Updates: Plan to release updates to your app to fix bugs, add features, or improve performance. To submit an app update, you will create a new version in App Store Connect (e.g., version 1.1 if your launch was 1.0) and go through a similar process: upload a new build, fill out the “What’s New” text, and submit for review. Updates often get faster reviews, but you still should allow ~1-2 days for approval in most cases.
App Store Connect makes it easy to track your version history and statuses of each update. You can also use Phased Release for updates if you want to roll out an update gradually over 7 days to catch any major issues before it reaches all users (this is configurable when you release an update).
- Crash Logs & Diagnostics: For apps that have been live, Apple provides some aggregated crash reports and diagnostics in the Xcode Organizer or the App Store Connect (under Analytics > Metrics or via Xcode). While not as detailed as some third-party crash analytics, it can alert you to trending crashes. Utilizing TestFlight for beta testing future versions can also help catch issues early.
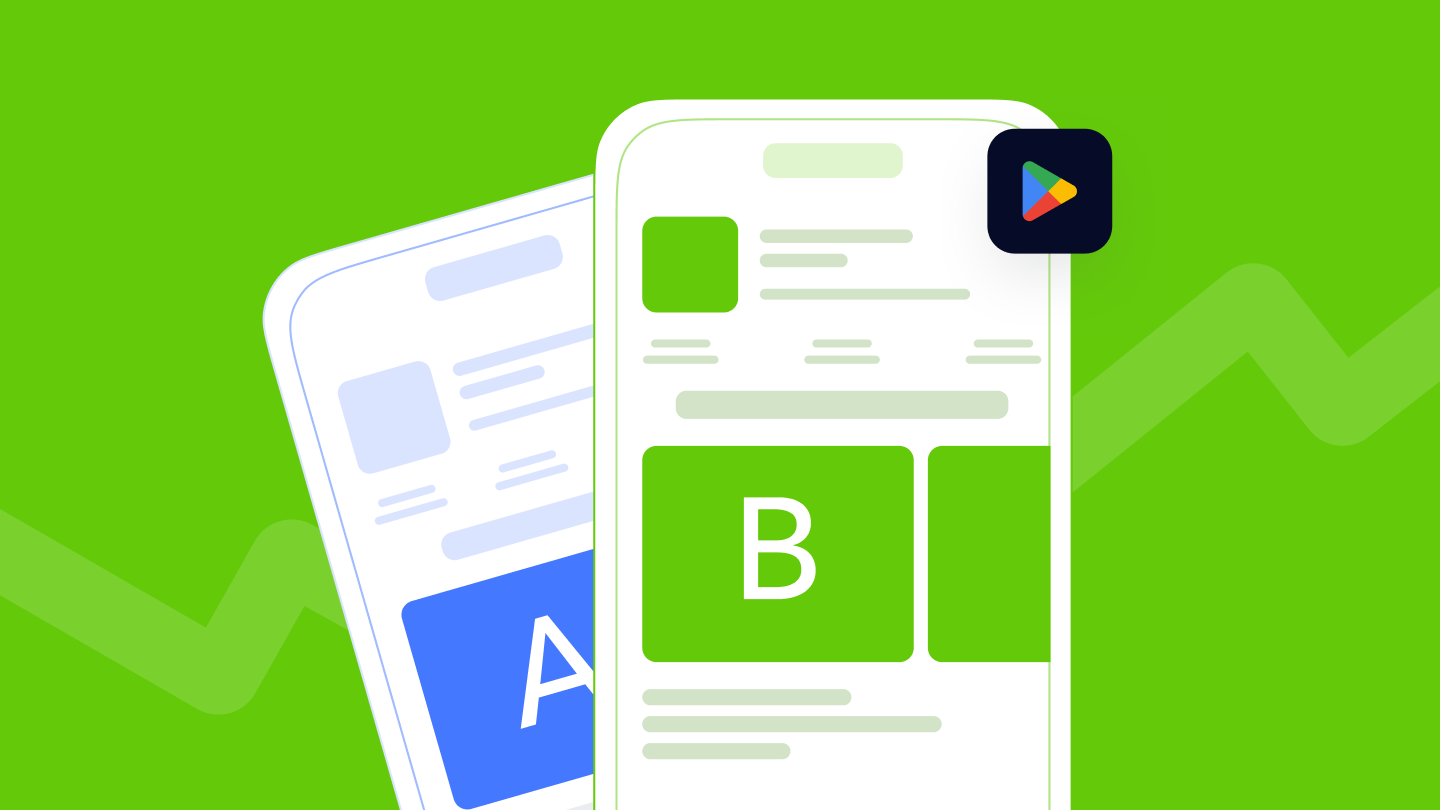
- Marketing and Promotion: App Store Connect now includes tools for app marketing. You can set up In-App Events (time-limited events or promotions that show up on the App Store), create Custom Product Pages tailored to specific audiences or campaigns, and even run Product Page Optimization tests (A/B testing different icons, screenshots, or descriptions to see which performs better) Take advantage of these features to improve your app’s presence.
For example, you might create a custom product page for a holiday promotion or test two different sets of screenshots to see which drives more downloads. These advanced tools can significantly boost your app’s performance in the store over time.
- Internal Links & Resources: As you manage your app, continue learning and refining your approach. Check out resources like our iOS app marketing tips for strategies to increase downloads, or dive into Apple’s documentation and developer forums (accessible via App Store Connect’s Support links) for any specific questions.
Conclusion
Using App Store Connect in 2026 is a foundational skill for launching and maintaining a successful iOS app. By following this step-by-step guide, you’ve learned how to use App Store Connect to set up your account, create your app listing, upload your build, and navigate the submission process. We also touched on post-launch management — leveraging analytics to guide your updates and responding to users to build a strong app reputation.
Remember, the mobile app landscape is competitive and always evolving. Apple regularly updates App Store Connect with new features and requirements (for example, privacy disclosures have become mandatory, and new platform support like watchOS or visionOS can be managed from the same interface). Stay informed about Apple’s announcements and App Store guidelines to ensure you’re using App Store Connect to its full potential.
Don’t forget that mastering App Store Connect is the foundation; turning that foundation into measurable growth is where teams win. Need a hand getting started? Reach out to us, and we’d be happy to walk you through it.
Your mobile app growth partner with intelligence, automation and expertise.