


Looking to boost your app's visibility and acquire more users? Our 2025 ASO Report is your ultimate guide to navigating the evolving app store landscape. Packed with data-driven insights, keyword trends, and top-ranking app strategies, this report will equip you with the knowledge to optimize your app's presence and achieve organic growth.
If you’re building your first Android app, learning how to use Google Play Console is one of the most important steps in your publishing and app-growth journey. Google Play Console is where you create your developer account, upload your app, manage releases, optimize your store listing, track performance, and keep your app compliant with Google Play policies.
In this blog post, we walk you through everything step by step. You’ll learn what Google Play Console is, how to create an account, where to find key sections, how to create and optimize your store listing for visibility and search keywords, how to upload an AAB/APK, and how to publish your app on Google Play for the first time.
Let’s start with the fundamentals before moving to setup and publishing.
What is Google Play Console and what is it used for?
Google Play Console is the official platform you use to publish, manage, and optimize Android apps on the Google Play Store. If you want your app to appear on Google Play, this is the tool you work with every day.
You use Google Play Console to:
- Create and manage your Google Play developer account
- Upload and manage your app artifacts (mainly AAB, sometimes APK)
- Set up your store listing (title, description, screenshots, icon)
- Provide policy and compliance information (App Content, Data Safety, permissions)
- Manage internal, closed, and production testing
- Track installs, revenue, ratings, crashes, and ANRs
- Release updates and manage versioning
- Optimize visibility with store listing experiments
- Improve performance through pre-launch reports and testing tools
How to create a Google Play Console account (step-by-step for beginners)
To start using Google Play Console, you need a developer account. The steps include meeting the basic requirements, signing in with your Google Account, paying the one-time registration fee, and completing your developer profile.
Requirements to create a Google Play Console account
Google lists the following requirements in its official help articles:
You must:
- Be at least 18 years old to register a developer account.
- Have a Google Account to sign in and register.
- Pay a one-time US$25 registration fee using an accepted payment method through Google Payments.
Google’s documentation also explains that you need to provide accurate developer information, such as your developer name, contact email, and other required identity details, before you can publish apps.

Step 1: Sign in with your Google Account
Go to the official Google Play Console site and sign in with your Google Account. This must be a personal Google Account or a Google Workspace account that you have access to. Google states that you can use any Google Account to register, as long as it meets the age requirement.
Step 2: Begin registration and pay the one-time fee
After signing in, Google directs you to the registration page. Here you must:
- Accept the Google Play Developer distribution terms.
- Pay the one-time US$25 registration fee using Google Payments.
Google accepts major credit and debit cards depending on your region. Once the payment is successful, your account moves to the developer profile setup step.
Step 3: Complete your developer profile
Google requires you to provide specific information so your apps can be published under a verified developer identity. This includes:
- Developer name (this is what users see on Google Play)
- Contact email address
- A contact phone number
- A physical address (for certain app types)
This information must be accurate and kept up to date, as Google uses it for user support visibility, policy compliance, and account verification.
Step 4: Verify your identity (if requested)
Depending on your region and account settings, Google may ask for identity verification. This can include verifying your government-issued ID or your legal entity information if you are creating an organization account. Verification is handled through Google’s official identity verification flow.
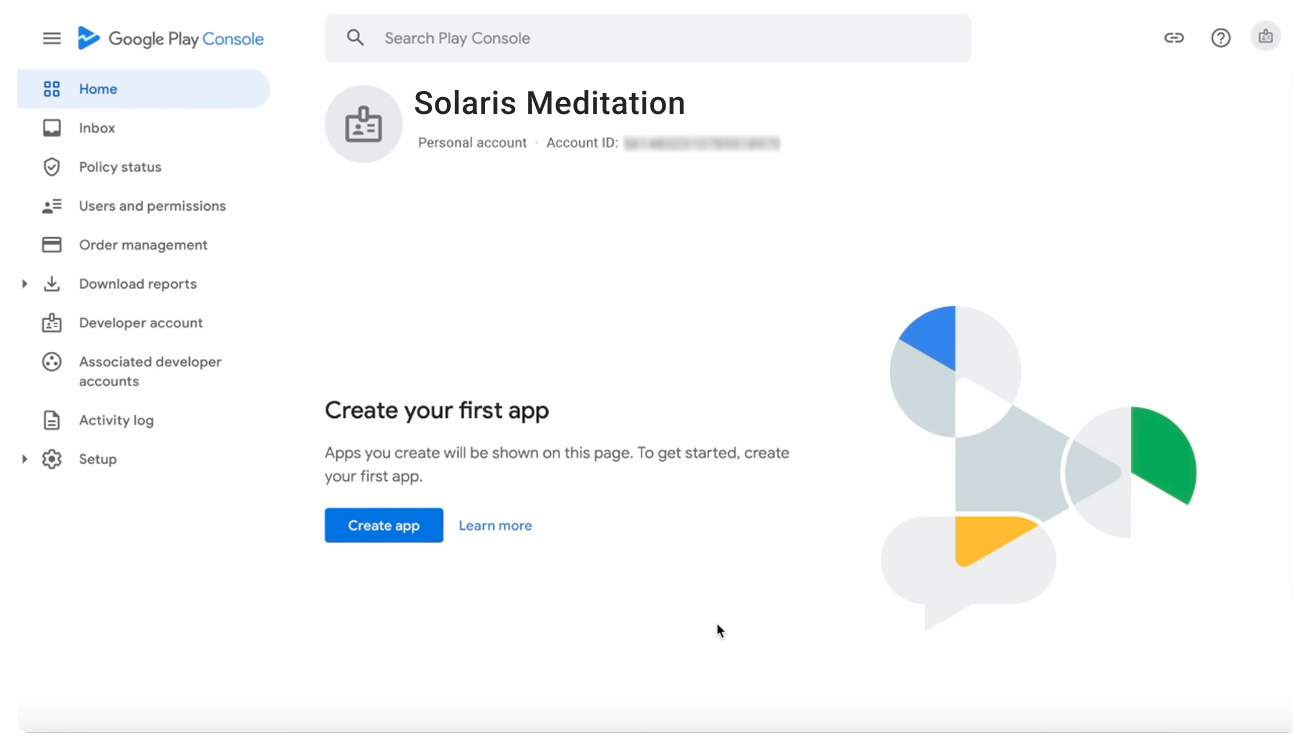
Once all required details are complete, your developer account becomes active. You can now access the Play Console dashboard and start creating your first app.
How to use Google Play Console for the first time
Once your account is active, after registration and developer-profile setup, you can sign in to Google Play Console and begin working with its features.
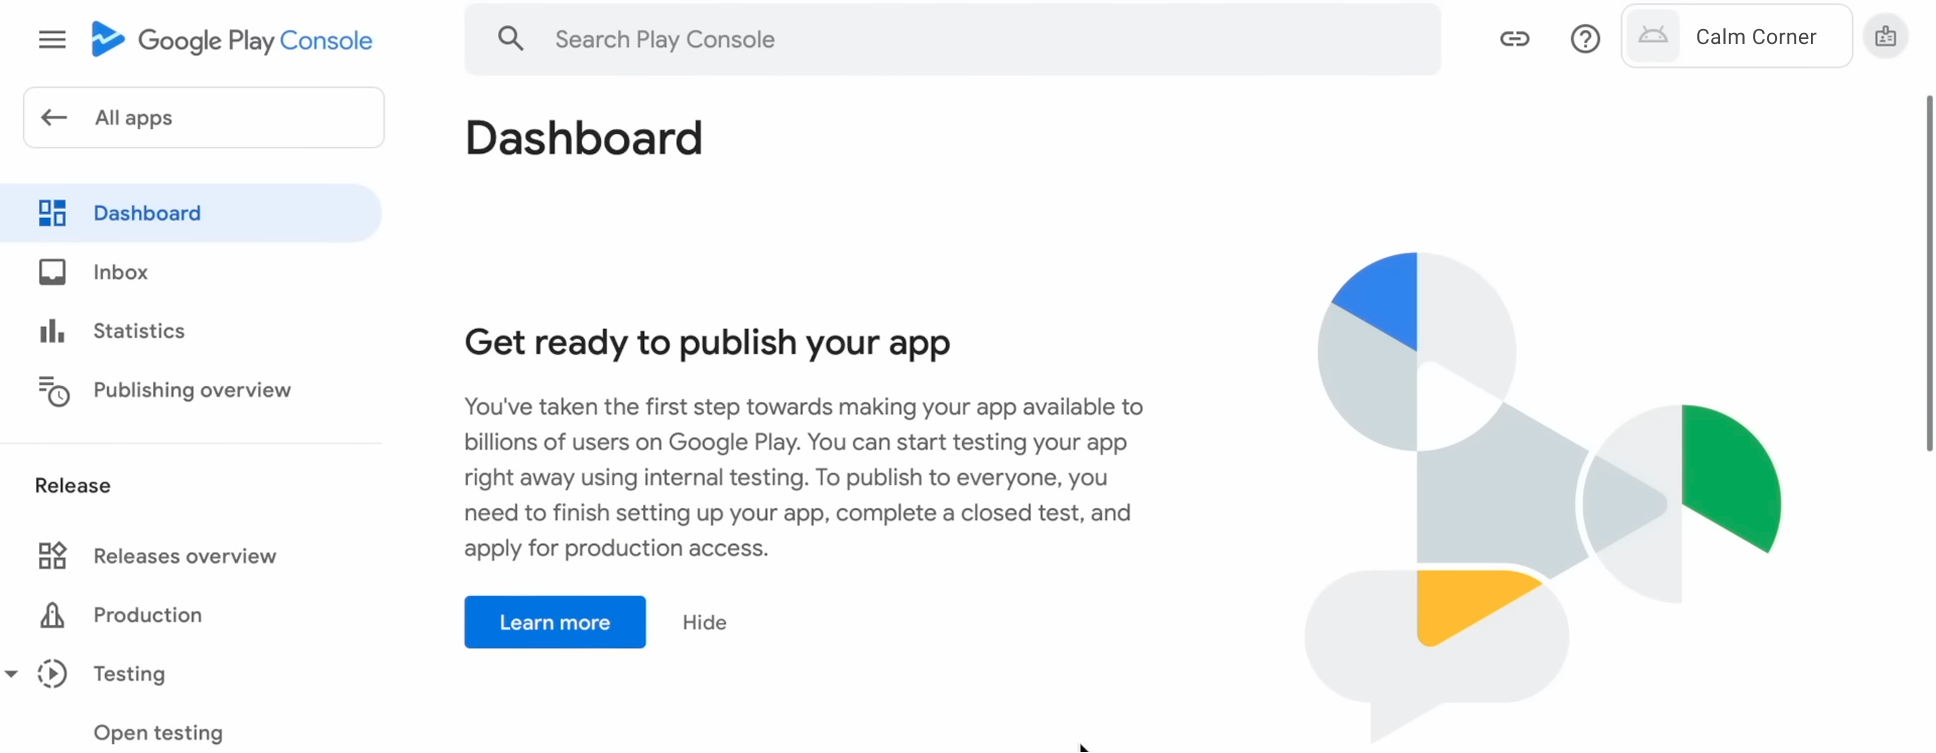
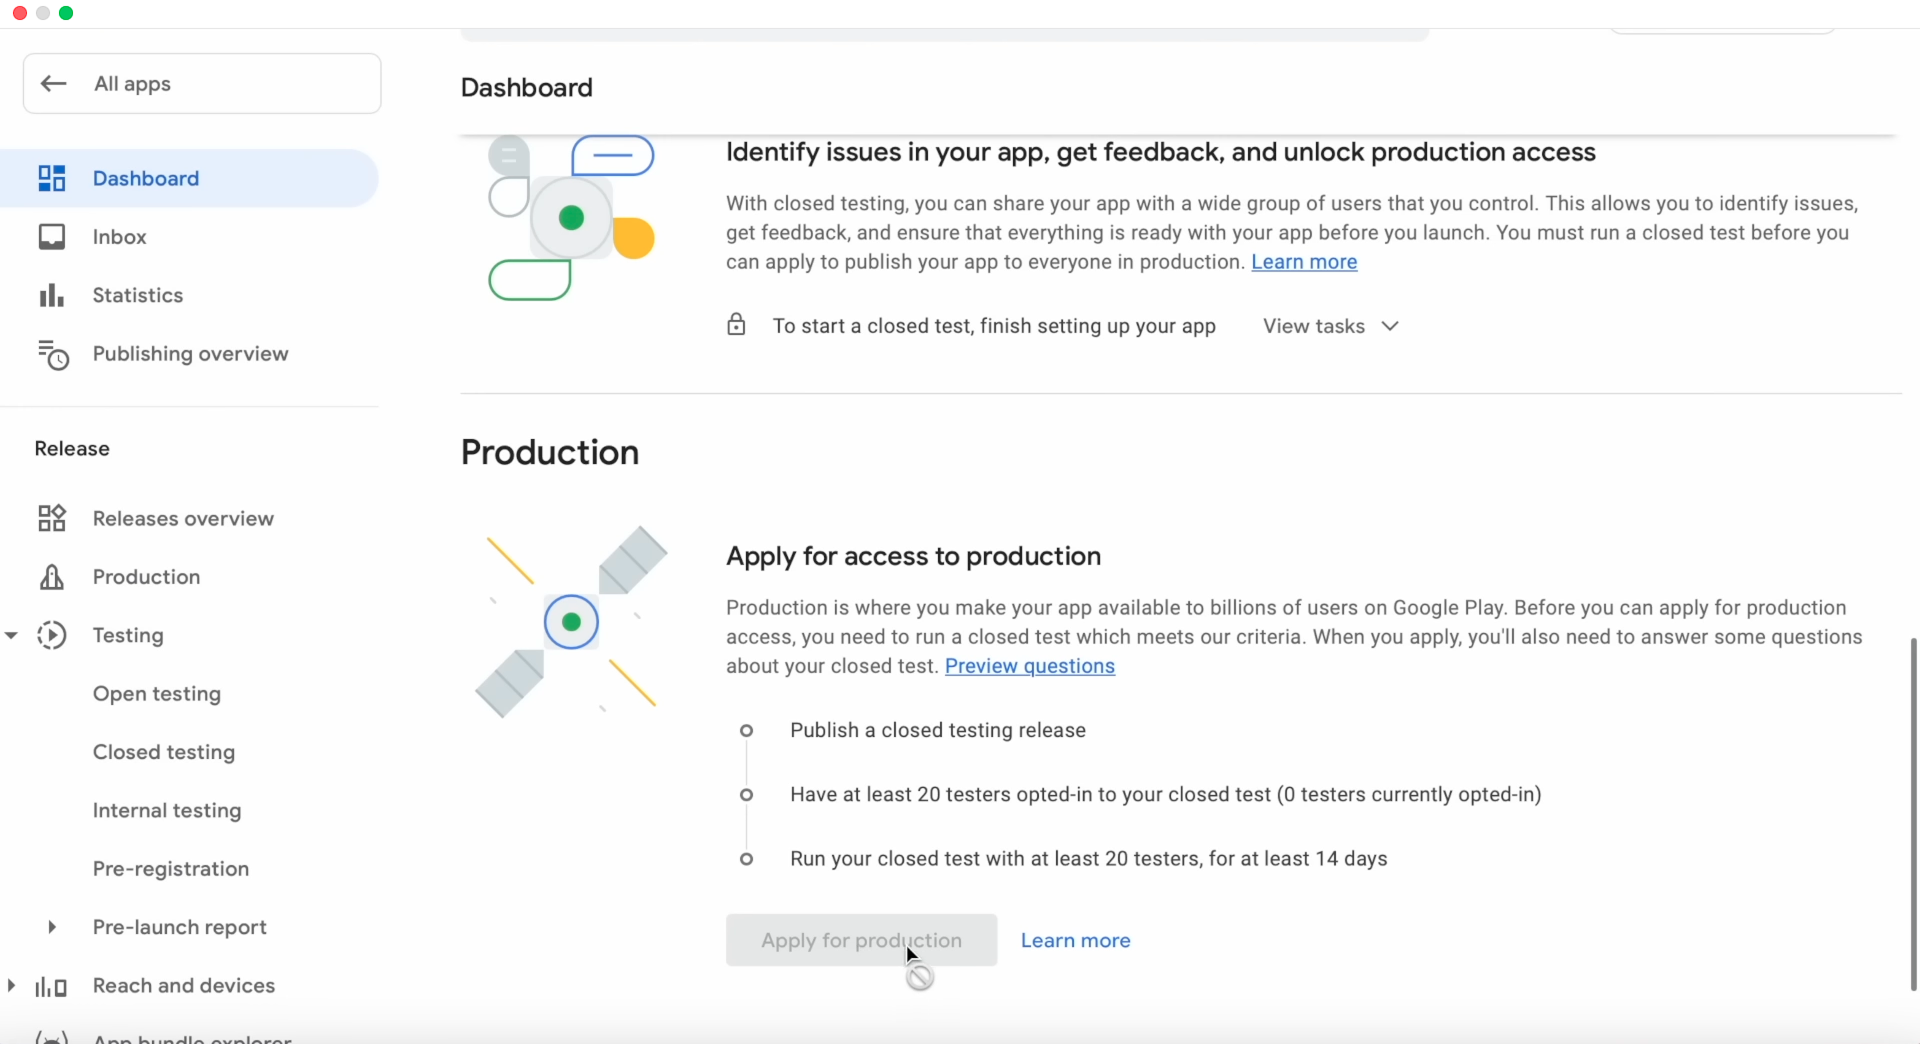
Google Play Console dashboard overview
When you first log in, you land on the Play Console home/dashboard. From here you can:
- Start creating a new app
- Access existing apps (if any)
- See notifications from Google (policy updates, account messages, etc.)
- View summary metrics for your apps, such as crashes, user feedback, or performance signals (once apps are live)
The dashboard acts as your central hub, from here you navigate to all major areas of app management, release, content settings, app store listing, and analytics.
Navigation guide: where to find main sections in Google Play Console
The left-side menu (sidebar) in Play Console gives you access to all major sections. Key sections you’ll frequently use include:
1. Dashboard
Your starting point. Here you can see:
- App status (draft, in review, published)
- Required tasks (e.g., set privacy policy, content rating, data safety)
- Testing progress (internal, closed, production)
- Alerts from Google
The Dashboard shows what you need to complete before you can publish.
2. Statistics
This section shows your app’s basic performance trends. You can view:
- Installs and uninstalls
- Active users
- Acquisition sources
- Device and country breakdowns
It’s useful for understanding how your app is growing over time.
3. Publishing overview
This page shows your publishing status and any pending tasks. Google identifies what must be completed before your app can be reviewed or rolled out. You can use this page to confirm whether everything is ready for submission.
4. Grow users
This section is for everything related to your store presence, including:
- Store listings (title, short description, long description, screenshots, icon, feature graphic)
- Store listing experiments
- Store settings (category, tags, contact details)
- Translation service
You’ll use this to control how your app appears on Google Play.
✴️Pro tip: Google Play also highlights apps through promotional placements during seasonal campaigns. If you’re curious about how apps use these placements or what types of apps get featured, you can check MobileAction’s Promotional Content insights. It tracks which apps appear in these Google Play promotional contents across countries and dates, which can help you see patterns before planning your own campaigns.
5. Monitor and improve
This section focuses on quality, policy, and device reach.
- Reach and devices
- Ratings and reviews
- Android vitals (crashes, ANRs, performance issues)
- Policy and programs, including:
- Policy status
- App content
- Teacher Approved (if relevant)
As a beginner, this is where Google shows problems or required declarations.
✴️ Pro tip: After your app goes live, you may want to track how your visibility changes over time. While Google Play Console shows basic insights, external tools like MobileAction’s Keyword Tracking can help you monitor how your rankings shift daily and whether your metadata updates make an impact.
6. Test and release
Everything related to uploading and publishing your app is here:
- Internal testing
- Closed testing
- Open testing
- Production releases
This is where you upload your AAB/APK, create a release, and submit your app for review.
7. Monetize with Play
If your app includes in-app products or subscriptions, this is where you manage them. If your app is free and not monetized yet, you can skip this section for now.
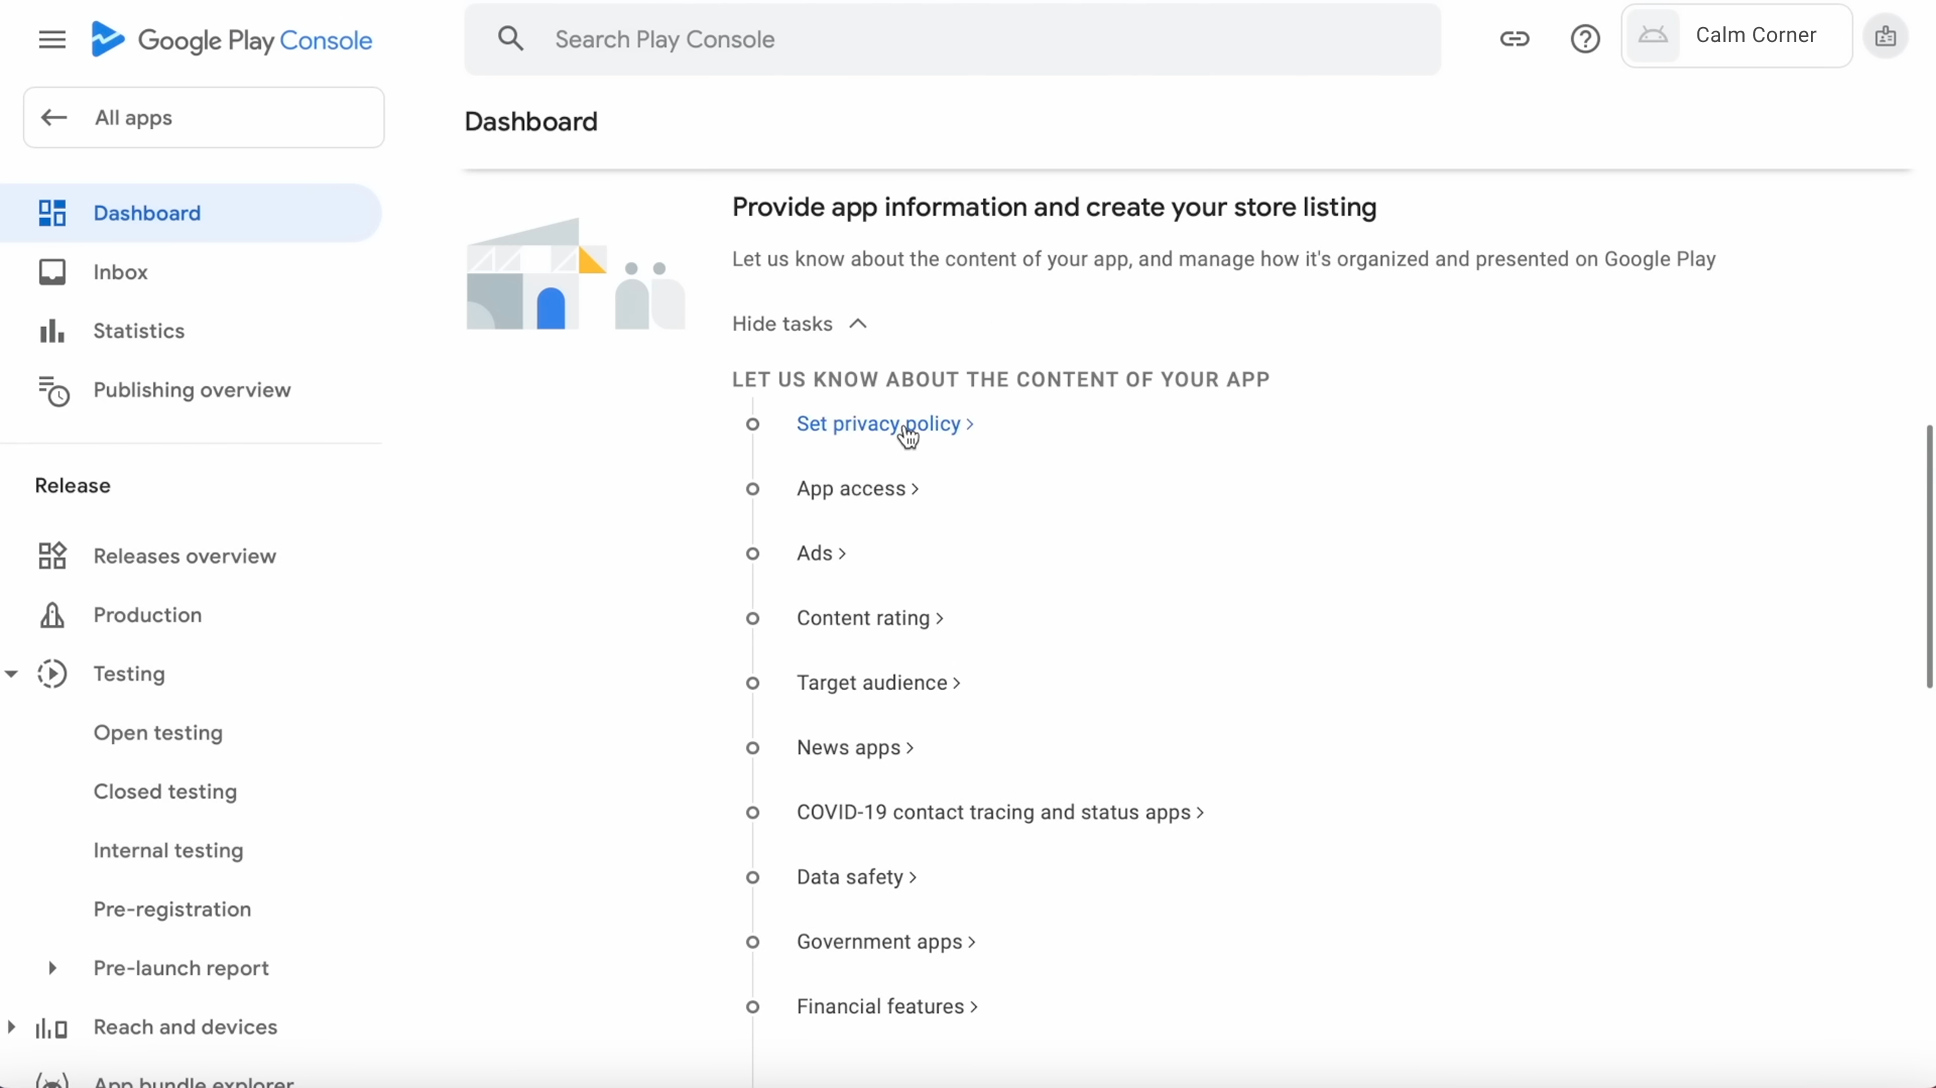
Where to find App Content in Google Play Console
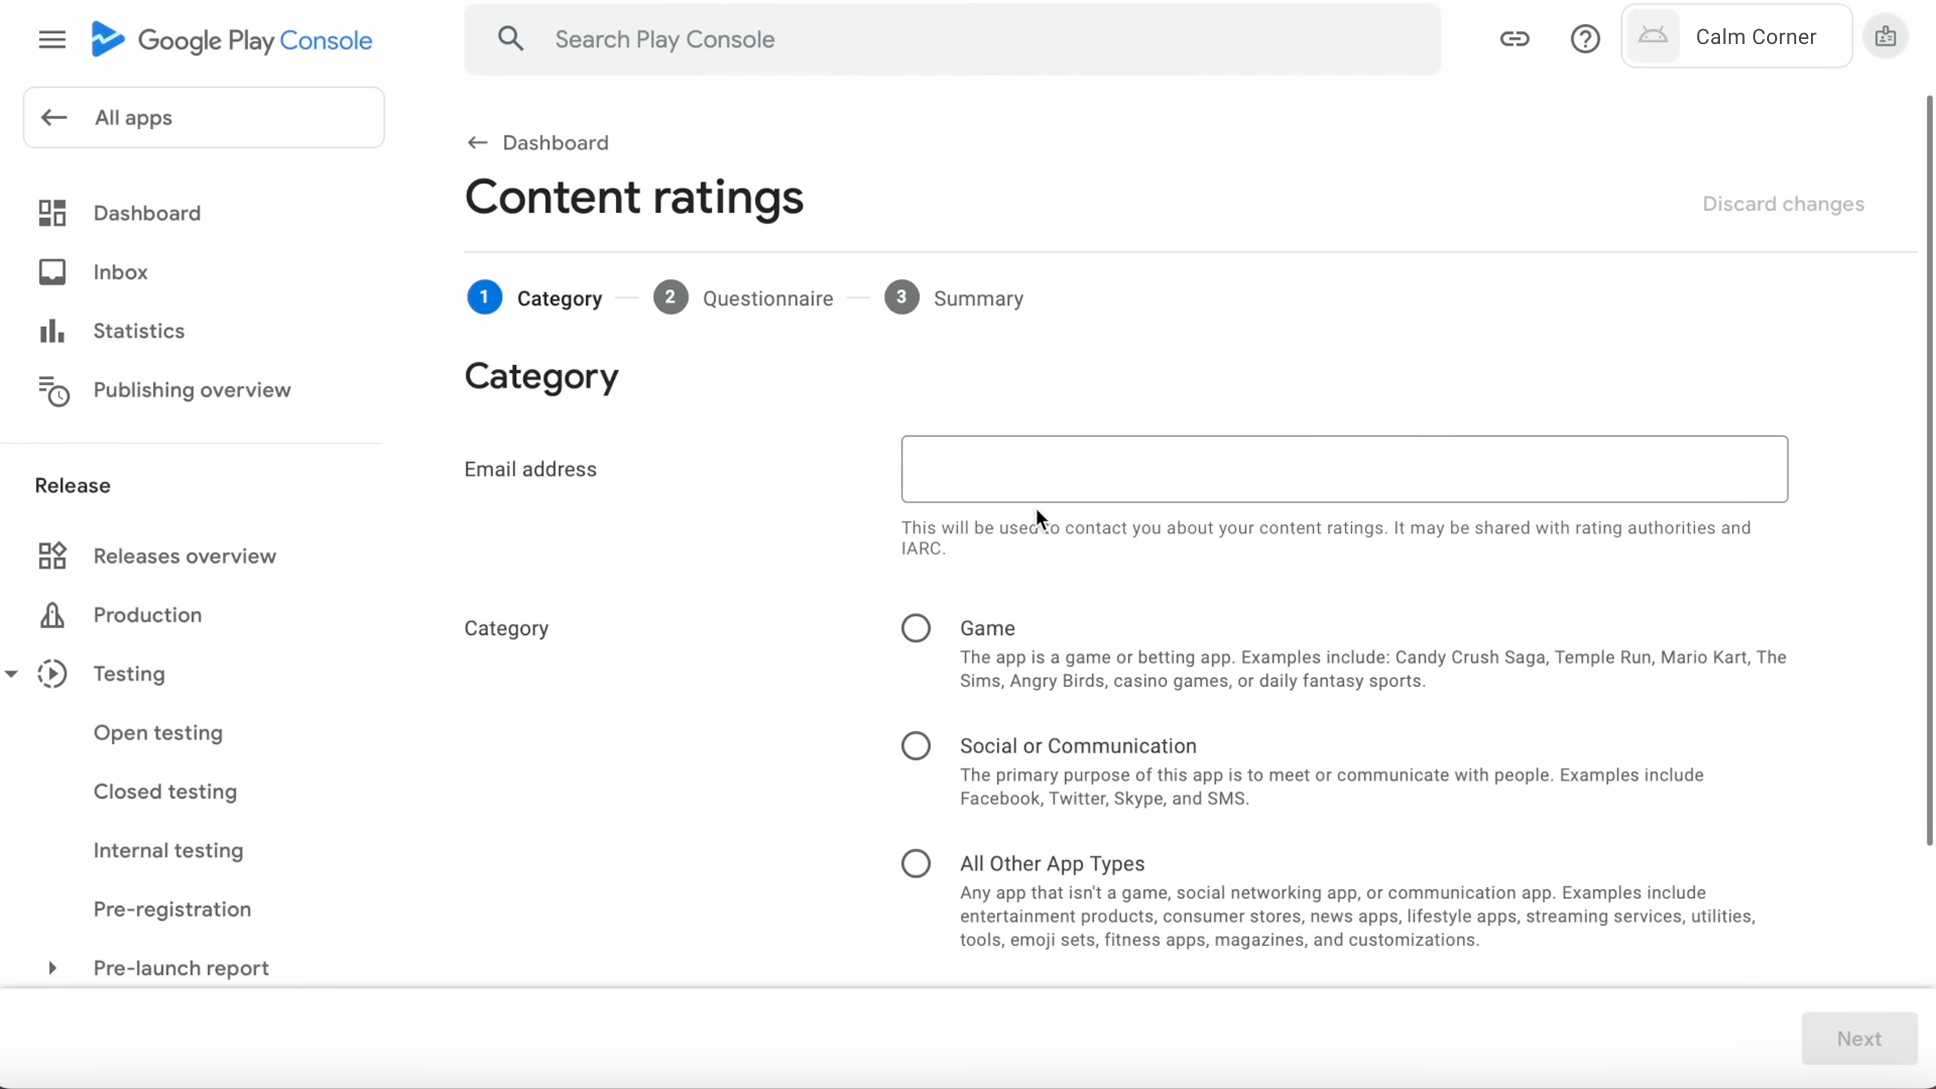
“App Content” is a critical area where you declare information required by Google before publishing or updating your app. To find App Content;
- Left menu → Monitor and improve
- Under Policy and programs, click App content
Inside App content, you’ll see tasks like:
- Target audience
- Content rating
- Data safety
- Ads
- App access
- Privacy policy
Your app cannot be reviewed or published until all required sections are completed.
How to create a new app in Google Play Console
Once you understand the dashboard, your next step is to create your first app. The console guides you through each required field before an app can be published.
To create a new app:
- Sign in to Google Play Console.
- From the left menu, select All apps.
- Click Create app.
- Follow the required fields on the creation screen.
Google requires you to provide several details at the moment you create the app. These include:
- App name (this appears on Google Play; you can change it later)
- Default language
- App type (App or Game)
- Free or Paid
- Declarations confirming that you meet Play policies and that your app will comply with Google Play guidelines
After creation, Play Console takes you to the main app dashboard where you can begin filling in store listing content, App Content forms, release details, and testing tracks.
How to change app name on Google Play Console (store listing name vs internal name)
When creating your app, you choose an App name. However, Play Console uses two different “names”:
1. Internal app name
- Used only inside your Google Play Console.
- Helps you organize your apps.
- Not visible to users.
- Google allows you to edit this at any time in your app’s Setup / Advanced settings section.
2. Store listing name (App name shown on Google Play)
- This is the public name users see on the Play Store.
- It appears in search, on your product page, and in the “Publisher” view.
- To change it, you edit your Main store listing → App name.
- Changes go through Google’s review before appearing publicly.
Google makes it clear that the store listing name must follow Play Store policies, including rules for trademarks, branding, and misleading content. You can update it as often as needed, but every change requires review.
How to fill basic app details and App Content in Google Play Console
After creating your app, your next steps involve completing the basic details and policy-required declarations. Google breaks this into two major areas:
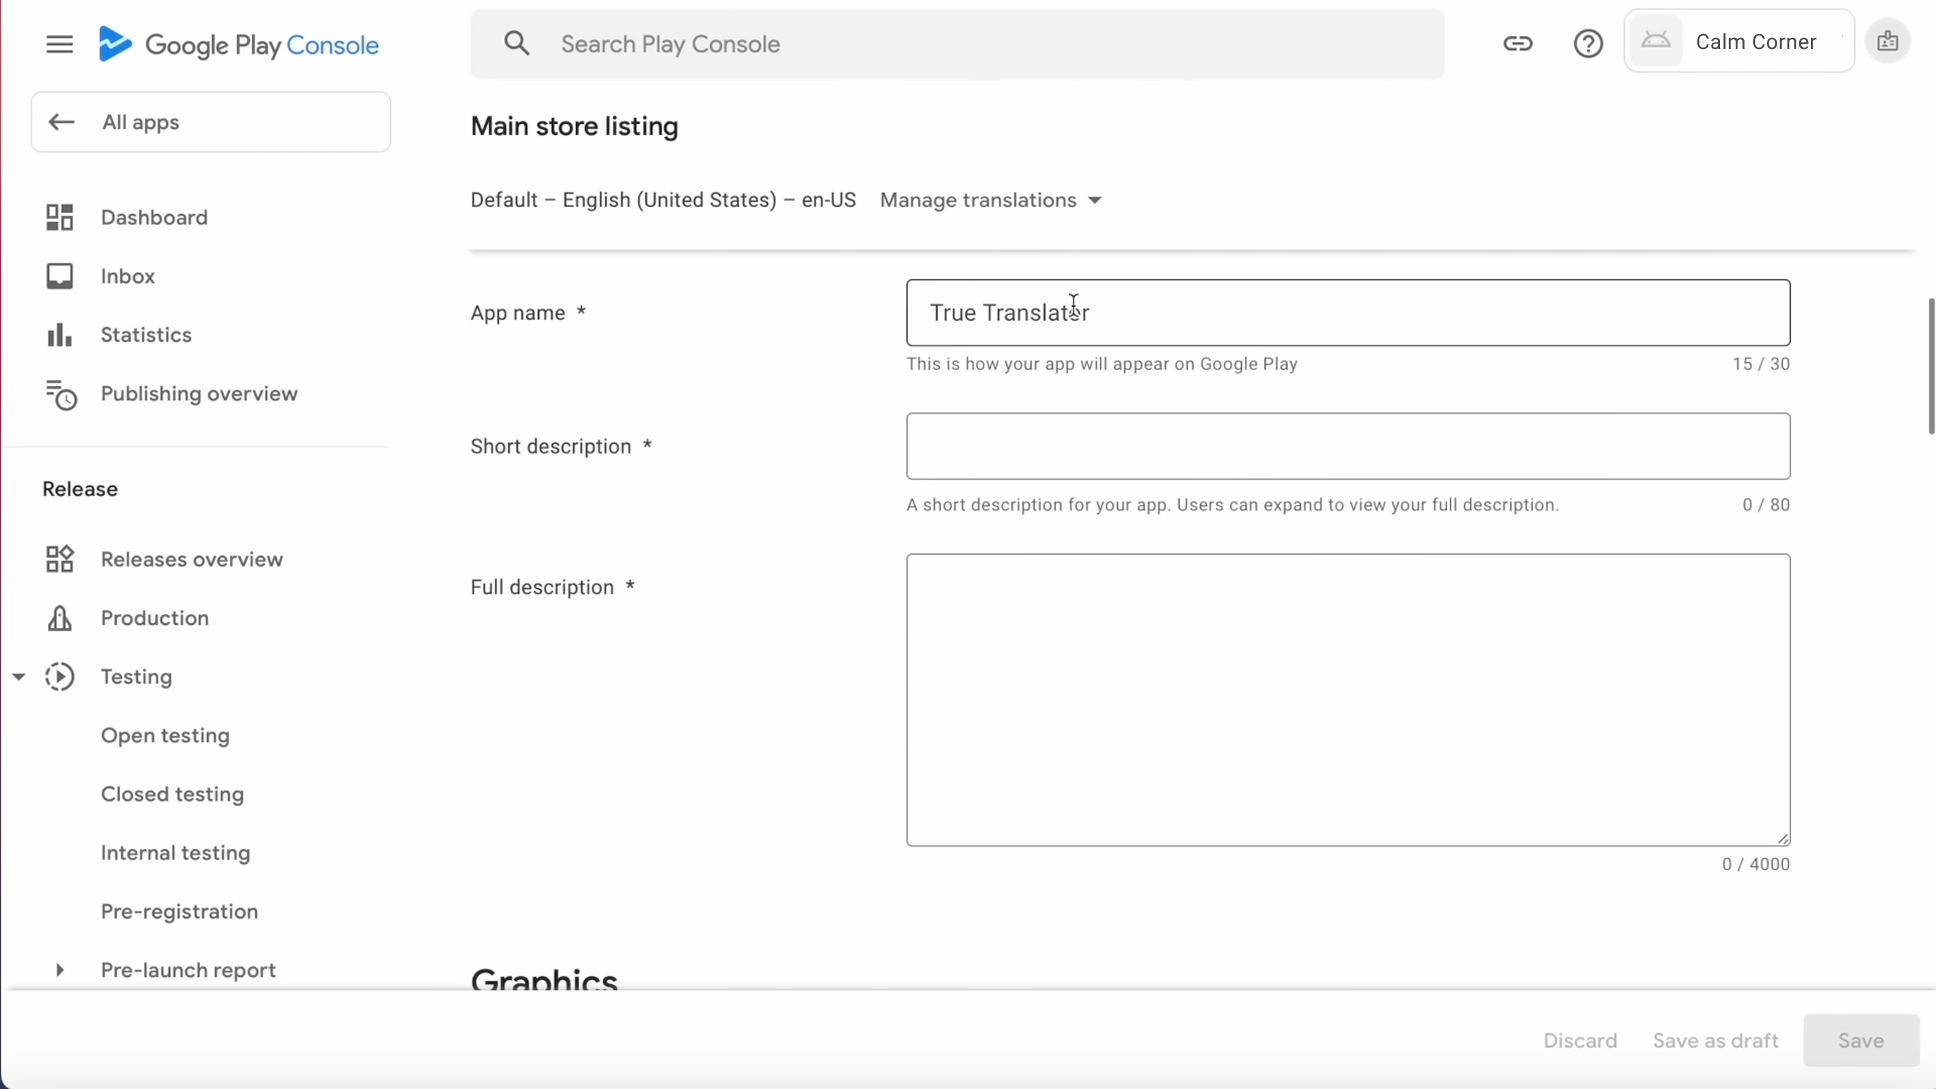
1. Basic app details (Store listing)
These are the fields Google requires for your Play Store product page. They are part of the “Main store listing” section. You will need to complete:
- App name
- Short description
- Full description
- App icon
- Featured graphics (if required for your category)
- Screenshots
- App category (App or Game, plus category/sub-category)
- Contact information (email, website, phone, depending on app type)
These elements determine how your app appears on Google Play. Google reviews all store listing content to ensure it meets Play policy guidelines.
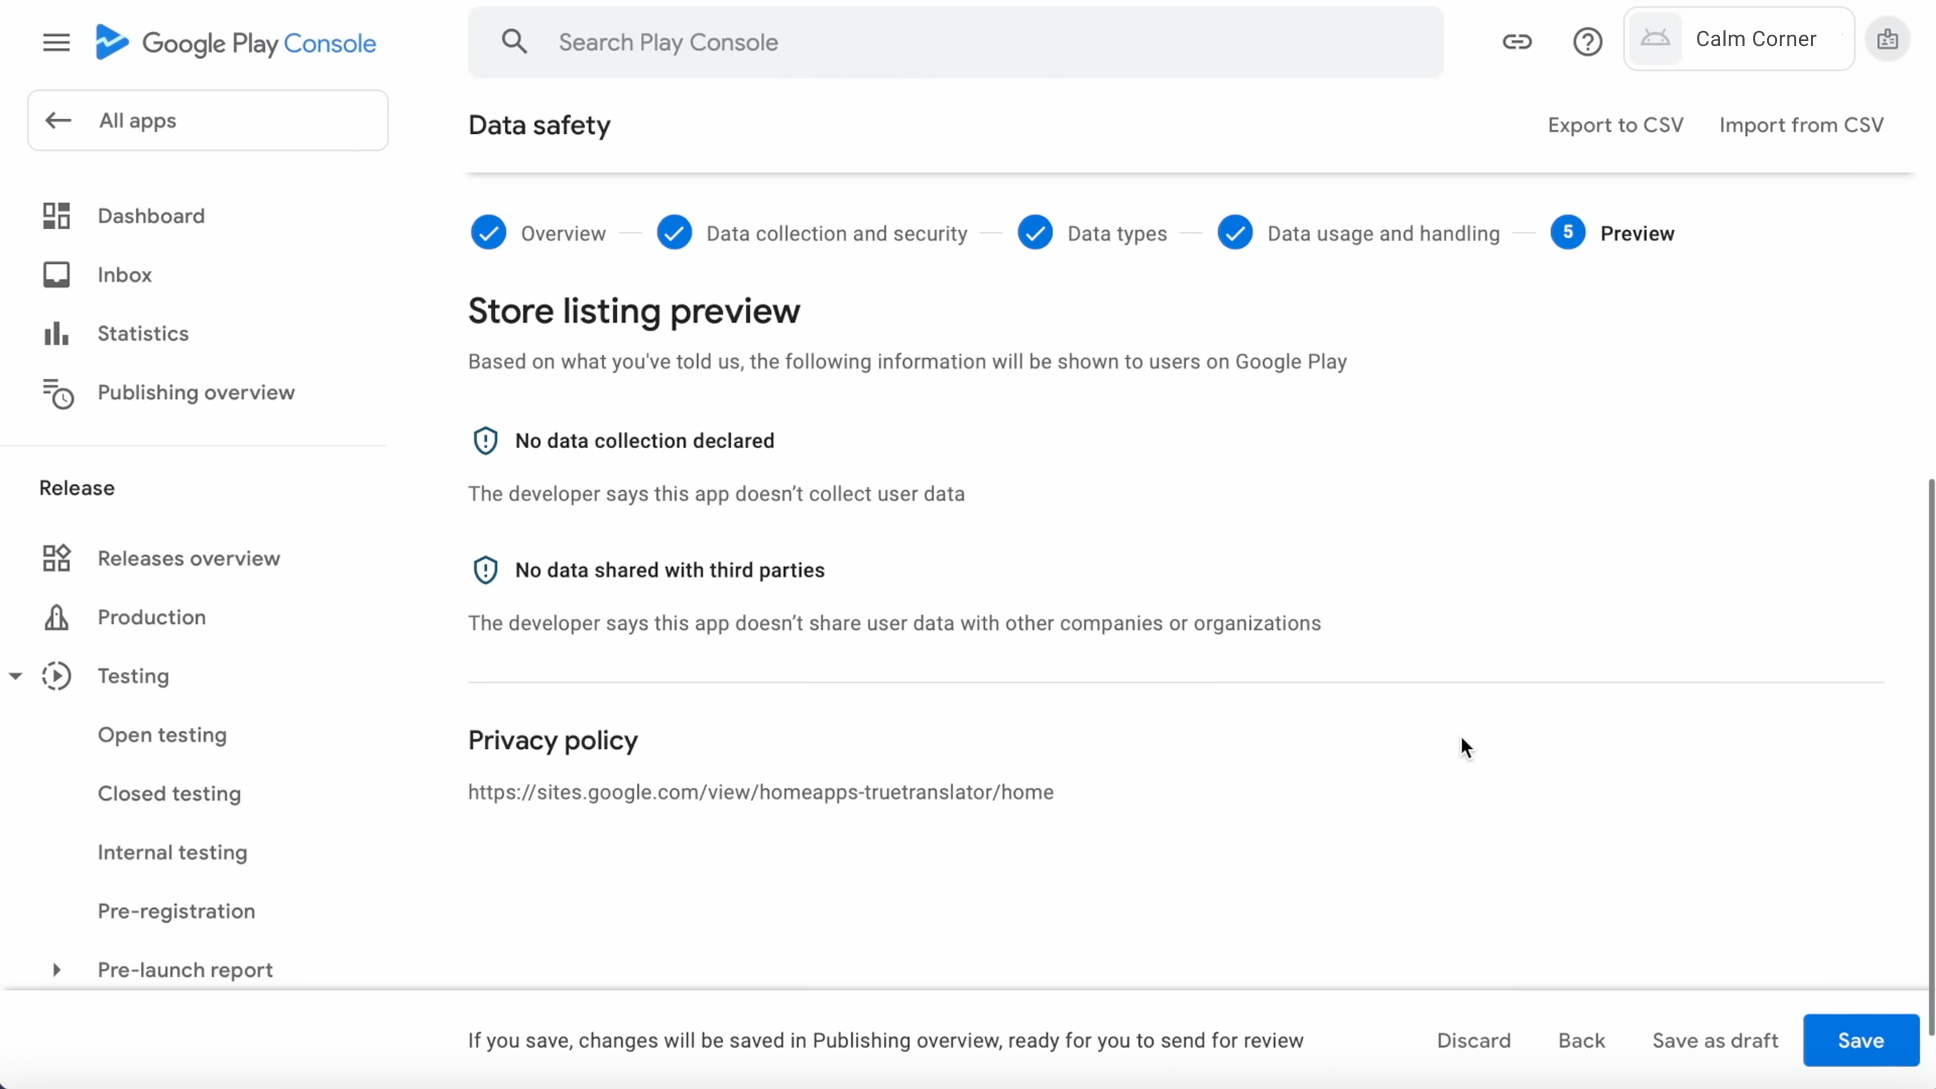
2. App Content (Policy declarations)
The App Content section is required. Google uses these declarations to ensure your app complies with Play policies. Missing or incomplete submissions will block your app from being published.x
Inside Policy → App content, you’ll see:
- Target audience and age groups
- Content rating questionnaire
- Data safety form (details on what data your app collects and how it is used)
- Ads declaration (if your app contains ads)
- Privacy policy URL
- Permissions declarations (for apps using restricted permissions)
Each form must be completed accurately. Google may suspend apps that provide incorrect or incomplete information, especially in the Data safety section. If your app changes later (for example, it collects new types of data), Google requires you to update these declarations.
After completing the store listing and App Content sections, your app will be ready for release preparation and building your first production rollout.
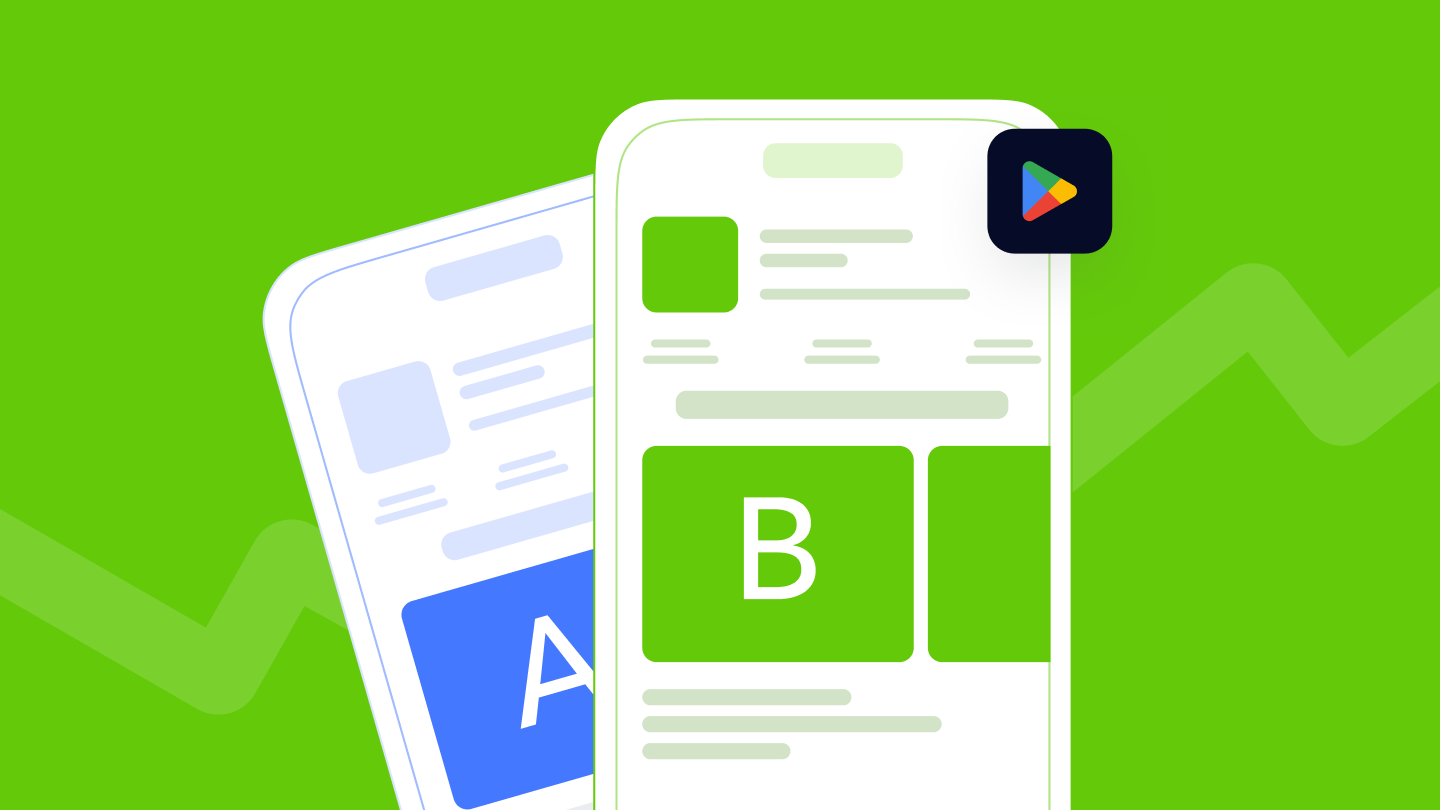
How to add metadata and keywords in Google Play Console (ASO basics)
When you publish or update an app via Google Play Console, you control how your app appears to users, including its name, description, screenshots, and more. These elements form your store listing metadata. Because there is no dedicated “keywords” field in Play Console, keyword optimization depends on how you use the visible metadata fields.
If you’re new to Google Play ASO, the key idea is to improve your app’s visibility by using relevant keywords directly in your app’s metadata.
Below you can see how you add metadata, and how to approach keyword optimization within Google’s official guidelines.
Store listing metadata fields in Play Console
As explained earlier in the Basic app details section, you manage your app title, short description, long description, and visual assets under Grow users → Store presence → Main store listing. Below we focus on how to use them for keyword optimization.
How to add keywords in Google Play Console
Unlike some other app stores, Play Console does not provide a separate “keywords” input field. Instead, your listing’s discoverability on Google Play search depends on how you incorporate relevant keywords into your metadata:
- Title – As the app title is public and highly visible, this is where you place your most important keyword(s). But note: Google enforces a character limit (30 characters) and prohibits misleading or promotional words (e.g., “#1”, “Best”, “Top”, promotional claims) in titles.
- Short description – This is another key field for boosting visibility and conversion. A few relevant keywords can be placed here, but text should remain descriptive and honest, avoiding promotional or ranking-claim language.
- Long description – Use this space to describe your app’s functions, features, use cases, and benefits. Naturally incorporate relevant, semantic keywords within readable, meaningful sentences Avoid stuffing or listing keywords unnaturally, that violates metadata policy.
Because Google Play doesn’t offer a hidden keyword field, you need to include important keywords directly in the text users can see (title, short description, long description) so your app can be found more easily in search.
✴️ Pro tip: When adding keywords to your title or description, it helps to understand how competitive those keywords are and which apps already rank for them. A quick mobile app competitor analysis can make this easier. If you want to explore keywords before publishing, you can try a tool like MobileAction’s Keyword Inspector. It shows keyword difficulty and the top ranking apps, so you can avoid overly competitive terms and choose more realistic keywords.
Google Play Console search keywords: where to find them (and common confusion)
When you first look for “search keywords” in the Google Play Console, it’s easy to assume there’s a dedicated section to manage them. In reality, Google Play Console does not include a field or tool labeled “search keywords”.
If you’re searching for google play console search keywords or google play console keywords, you’re usually trying to understand how Google Play decides which apps appear for specific search terms. This confusion is common, especially if you’re familiar with web SEO or other platforms that offer a separate keyword input.
In Google Play Console, keyword relevance comes from your store listing content and how users interact with your app. Google analyzes the text you provide in your app name, short description, and long description, then combines that information with user behavior signals such as installs and engagement.
That’s why, when you optimize keywords in Google Play Console, you don’t “add” them in one place. Instead, you improve discoverability by writing clear, accurate store listing text that reflects what your app actually does and how users search for it.
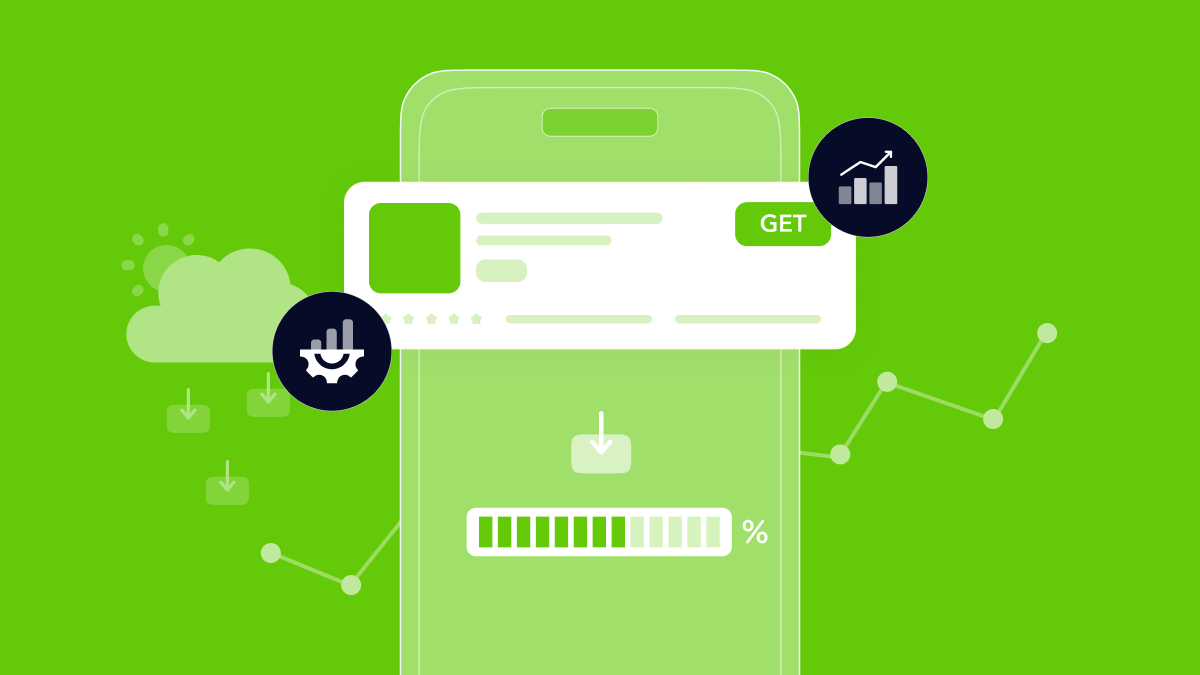
How to publish an app on Google Play Console (step-by-step)
After you finish your app listing and metadata, the next step is to publish your app. This means uploading your build, submitting your release, and rolling it out.
How to prepare your app for release in Google Play Console (checklist for beginners)
Before you proceed to upload and publish, make sure you have completed these prerequisites:
- You have built a signed Android App Bundle (AAB) for your app. As of August 2021, Google requires new apps to be published using Android App Bundles rather than APKs.
- You have enrolled in Play App Signing (or agreed to have Google manage your app-signing key), required for new apps.
- Your store listing (title, description, assets) and app content (policy forms, data safety, content rating etc.) are complete. (Because incomplete store listing or missing policy declarations will block publication.)
- Your app’s versionCode is the internal number Google Play uses to identify new builds, and versionName is the version users see. For every update you upload, Google Play requires you to set a higher versionCode than before.
Once you’ve addressed the above, you’re ready to upload your build and publish.
Step 1: Create a release
In Google Play Console, go to the left-side menu → Test and release → Production (or the relevant testing track if you don’t want to publish to everyone yet). Then click Create new release.
You’ll start a “release draft”, a container for one or more app versions (AABs/APKs) that you intend to launch or roll out.
Step 2: Upload your AAB (or APK if applicable)
In your release draft, upload your signed AAB file. Google Play will process the AAB and automatically create optimized APKs for different devices, so you don’t need to build separate APKs yourself.
If this is your first release, confirm that Play App Signing is enabled and set up correctly.
After the upload finishes, you can view the processed files in App bundle explorer → Latest releases and bundles.
Step 3: Add release details
In the same draft release, you should:
- Provide a Release name (e.g. “v1.0 – initial launch”), optional but recommended for clarity.
- Add Release notes (what’s new in this version), helps users understand updates.
These details are visible to users under “What’s new” when they install or update the app.
Step 4: Review and roll out the release
After you add your build and fill in the release details, click Save (or Save as draft). Then go to the Review release.
On this screen, Google Play checks your release for missing information, policy issues, or errors. You must fix all errors before you can publish. Warnings won’t block you, but you should still review them.
When everything looks correct, click Start rollout to Production (or another track). For your first release, this will publish the app to all users in the countries you selected.
How to upload an AAB or APK file in Google Play Console
Since August 2021, Google recommends (and requires for new apps) publishing via Android App Bundle (AAB).
To upload your build:
- Sign the release version of your app using the upload key.
- In Play Console, inside your app → go to Release → Production → Create new release.
- Drag and drop or select your AAB file; wait for upload to complete. Play Console processes your bundle and prepares device-specific APKs for distribution.
If instead your app was built as an APK (for legacy support), Play Console still accepts it, but AAB is the preferred and default format for better optimization.
How to submit and publish your app on Google Play Console (review and rollout)
After your release draft is ready and your AAB uploaded, follow these steps:
- Review release details, ensure all required fields are filled, store listing and App Content are complete, and there are no errors. (Google Yardım)
- Start rollout to production (or testing track if you prefer). If it’s your first release and everything passes review, your app becomes live on Google Play for the selected distribution countries. (Google Yardım)
- You will receive a confirmation once the app is live; users will then be able to see and install it. Google may also send emails about status and any post-release policy issues.
Common Google Play Console problems and beginner mistakes
When working with Google Play Console, many developers encounter similar issues. Below, we highlight the most common problems you may face and explain how to prevent them.
1. Not completing “App Content” (policy forms)
Google requires you to fill out all App Content declarations before your app can be published. If any part of this section is unfinished, Play Console will block the rollout.
Common missing items include:
- Target age group
- Data safety form
- Content rating questionnaire
- Ads declaration
- Privacy policy URL (when required)
If any of these are incomplete, Play Console will not allow a rollout. Make sure you complete every card under Policy → App Content.
2. Incorrect or incomplete Data safety information
Google strictly reviews the Data safety form. If the information does not accurately reflect what your app collects, uses, or shares, your app may be rejected or later removed. This usually happens when:
- You add a new SDK that collects data but forget to update the Data safety form.
- You select “no data collected” when the app actually collects diagnostic or usage data.
- You list permissions in the manifest but do not declare their purpose.
Always update the Data safety form whenever your app changes.
3. Content rating errors
Google may reject your app if the Content rating questionnaire is filled out incorrectly. A common issue is selecting an age rating that does not match your app’s actual content or features.
Answering the questionnaire accurately ensures your app receives the correct age rating from all supported rating authorities and prevents delays during review.
4. Store listing violations
Google has strict rules for store listing metadata. You must avoid:
- Promotional text in the app title (e.g., “Best app,” “#1,” “Free,” “Sale”)
- Repeating keywords too many times
- Misleading or unclear descriptions
- Irrelevant text, emojis, or symbols
- Screenshots that don’t match the actual app experience
Many developers try to add extra keywords or promotional phrases to improve visibility, but this often leads to policy violations. Even small issues in your metadata can delay review or block your release, so make sure your title, descriptions, and screenshots follow Google’s guidelines.
5. Uploading the wrong file type (APK instead of AAB for new apps)
New apps must be uploaded as Android App Bundles (AAB). Beginners sometimes try to upload an APK for their first release, which results in an error. Always build and sign an AAB for new apps.
6. Not increasing the versionCode for updates
When you upload an update, Google Play requires the versionCode to be higher than the one in your previous release. If you upload a build with the same versionCode, you’ll see this error:
“You need to use a higher versionCode for your APK or App Bundle.”
Always increase the versionCode before uploading a new build. The versionName can stay the same style, but versionCode must go up with every release.
7. Missing required screenshots or assets
Your listing must include screenshots for all required device types (phone, tablet, etc.). If any required asset is missing, Play Console will block your submission. Also, assets must follow Google’s size and format guidelines.
8. Not enabling Play App Signing
Since Play App Signing is required for new apps, skipping this step can prevent you from uploading or releasing the app. Make sure Play App Signing is enabled before uploading your first AAB.
9. Country availability mistakes
Beginners often forget to select which countries the app should be available in. If you leave the default settings unchanged, your app may be available only in a limited set of regions or possibly none.
Check the Countries/regions section under Setup or Distribution before publishing.
10. Misunderstanding the review timeline
Google reviews every app and update. Some beginners expect instant publishing, but review times vary. If your app is missing required declarations (Data safety, permissions, or rating info), the review will take longer or be rejected.
Being thorough with all forms and metadata speeds up review.
Conclusion: How to use Google Play Console with best practices

Now that you know how to use Google Play Console, the overall workflow becomes much easier to navigate. Google organizes the console around a clear structure, and once you understand it, we can manage each part of your app more confidently. Almost everything you do in the Google Play Console fits into four main areas:
- Create and set up your app: your store listing, App Content forms, assets, and required declarations
- Prepare and roll out a release: uploading your AAB, adding release notes, setting versioning, and managing Play App Signing
- Manage your app after publishing: ratings, reviews, statistics, and country availability
- Monitor quality and policy compliance: crashes, ANRs, Data safety, permissions, and policy status
When you work through these areas step by step, you’re not just figuring out what is Google Play Console used for, you’re building a full workflow for long-term app management. Your goal isn’t simply how to publish an app on Google Play Console once, but to understand how each section supports the entire lifecycle of your app.
Best practices we recommend
- Complete all App Content forms carefully. If any part of App Content is missing, Data safety, content rating, age group, ads declaration, or your privacy policy, Google will block the release.
- Follow Google’s metadata rules. Keep your title under 30 characters, avoid promotional phrases, and make sure all descriptions and screenshots accurately reflect your app. This is essential for clean, compliant Google Play Console keyword optimization.
- Use Android App Bundles and Play App Signing. AABs are required for new apps, and Play App Signing helps you manage signing keys securely.
- Increase your versionCode for every update. Google uses versionCode to identify new builds, so updates will fail if it’s not higher than the previous release.
- Use Play Console insights to guide improvements. Your statistics, acquisition reports, ratings, and quality data help you refine your product and your store listing over time.
- Fix policy warnings before rollout. Any policy issue, including metadata violations, can delay approval.
- Keep your store listing accurate. Your descriptions, screenshots, and in-app behavior must match. This becomes especially important when you change app name, update assets, or adjust your listing for new releases.
By mastering these basics, you’re not only learning how to use Google Play Console, you’re building a strong foundation for long-term success on Google Play.
If you want help understanding your keyword landscape, competitors, or category trends while you work on your Google Play growth, MobileAction can be a useful companion. You can sign up today to explore the data and decide whether it adds value to your workflow.
Frequently asked questions
How do I activate the Google Play Console?
To activate Google Play Console, you need to register for a developer account using your Google Account. Google explains the activation steps in its “Get started with Play Console” documentation. You must:
- Sign in with a Google Account.
- Accept the Developer Distribution Agreement.
- Pay the one-time US$25 registration fee through Google Payments.
- Complete your developer profile with accurate contact information.
Once these steps are completed and verified, your Play Console account becomes active.
What is the difference between Google Play Console and Google Play Store?
According to Google’s documentation:
- Google Play Console is the platform developers use to create, manage, publish, and monitor apps.
- Google Play Store is the consumer-facing marketplace where users discover, download, and review apps.
You use Play Console to configure everything that eventually appears on the Play Store.
Can I change my app name later in Google Play Console?
Yes. Google confirms that the App name shown on Google Play can be updated at any time from the Store listing section.
There are two names:
- Internal app name, visible only inside your Play Console; editable anytime.
- Store listing name (public app name), this is what users see on Google Play; changes require review and must comply with metadata policies, including the 30-character limit and content rules.
Do I need keywords for Google Play Console?
Google does not provide a separate “keywords” field in Play Console. Instead, Google explains in “Get discovered on Google Play search” that discoverability depends on:
- Clear, relevant store listing text
- A complete and optimized description
- Accurate titles and metadata
- App quality and user engagement signals
In practice, your “keywords” are the terms you include, naturally and accurately, in your app name, short description, and full description.
Does Google Play Console have search keywords?
No. Google Play Console does not provide a separate “search keywords” field. Keyword relevance comes from your app’s store listing text and user behavior signals.
Related readings
Content Marketing Specialist